How to Plant an Avocado Seed in Water
Growing an Avocado Seed in Water
How to plant an avocado seed in water – Growing an avocado tree from seed is a rewarding and surprisingly simple process. This guide will walk you through each step, from selecting the perfect seed to transplanting your thriving seedling into soil. With a little patience and care, you can enjoy the satisfaction of nurturing a young avocado plant from its humble beginnings.
Selecting and Preparing the Avocado Seed

Source: realsimple.com
The success of your avocado growing journey starts with selecting and preparing a viable seed. Choosing a healthy seed and properly cleaning it are crucial steps to ensure successful germination.
An ideal avocado seed is plump, firm, and free from any visible damage or discoloration. Avoid seeds that are shriveled, cracked, or show signs of mold. When selecting an avocado from the grocery store, choose one that is ripe but not overripe, as this will yield a healthier seed.
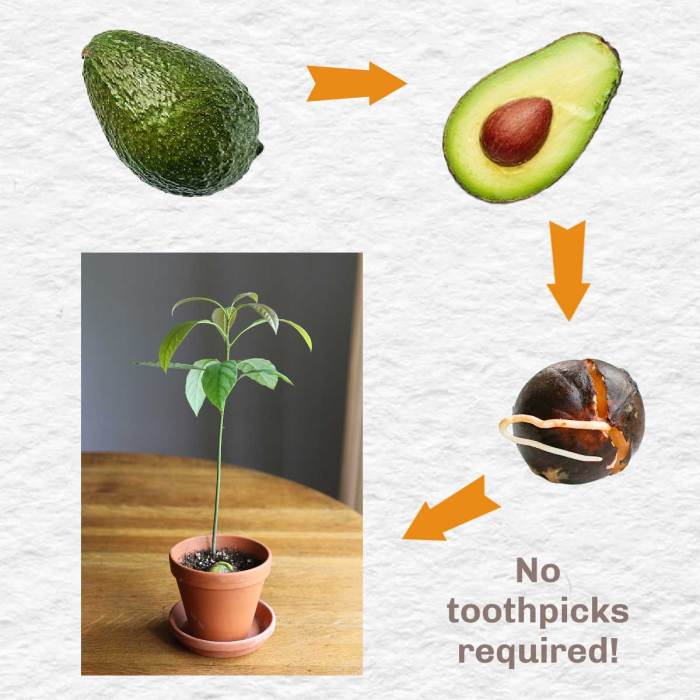
To remove the seed, carefully cut the avocado in half lengthwise. Gently twist the halves apart, revealing the large, brown seed nestled inside. Use a spoon to carefully scoop out the seed, taking care not to damage its surface. Thoroughly rinse the seed under cool running water to remove all traces of avocado flesh. This step is vital to prevent fungal growth and rot.
Methods for Germination in Water

Source: empressofdirt.net
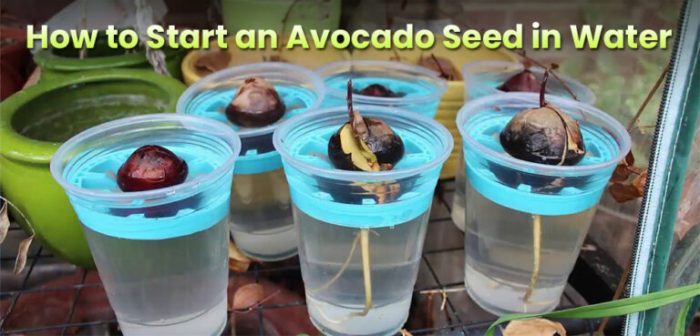
Several methods exist for germinating an avocado seed in water, each with its own advantages and disadvantages. The most common methods involve suspending the seed in water using toothpicks or placing it in a jar.
| Method | Setup | Advantages | Disadvantages |
|---|---|---|---|
| Toothpick Method | Seed suspended in water using toothpicks inserted into the sides. | Simple, inexpensive, and allows for easy observation of root growth. | Requires careful balancing to prevent the seed from tipping or sinking completely. |
| Jar Method | Seed placed in a jar with a small amount of water, ensuring only the bottom portion is submerged. | Relatively stable; less risk of the seed tipping. | May require more frequent water changes to prevent mold growth. |
| Shallow Dish Method | Seed resting on pebbles or a mesh screen in a shallow dish with a small amount of water in the bottom. | Good for preventing rot; easy to monitor. | Requires careful monitoring of water levels. |
| Suspended Net Method | Seed suspended in a small net bag within a jar of water. | Good for air circulation; prevents seed from rotting. | Requires finding a suitable net; slightly more complex setup. |
The toothpick method is a popular choice for its simplicity. Here’s a step-by-step guide:
- Insert three toothpicks into the seed, evenly spaced around its circumference, near the wider end.
- Rest the seed on the rim of a glass or jar, with the pointed end facing downwards, ensuring the bottom of the seed is submerged in a small amount of water.
- Initially, the seed will appear unchanged. Over time, you will observe a small root emerging from the pointed end, followed by a sprout emerging from the top.
- Maintain water levels, ensuring the bottom portion of the seed remains submerged but the top portion is exposed to air.
Maintaining optimal water levels is crucial. The bottom portion of the seed needs to be consistently moist to promote root development, but the seed should never be fully submerged, which can lead to rot. Regularly check the water level and replenish it as needed. Change the water every few days to prevent bacterial or fungal growth.
Monitoring and Maintaining the Seed

Source: embracegardening.com
Regular monitoring is key to ensure successful germination. Observing the seed’s progress will allow you to take corrective actions if necessary.
Successful germination is indicated by the emergence of a root from the pointed end of the seed, followed by a sprout emerging from the top. The root will grow downwards, while the sprout will grow upwards. Keep the seed in a warm location with indirect sunlight. Ideal temperatures range from 70-80°F (21-27°C). Direct sunlight can dry out the seed and hinder germination.
Avoid placing the seed in a drafty location.
Fungal growth is a common problem. To prevent it, ensure the seed is thoroughly cleaned and the water is changed regularly. If you notice any signs of mold, immediately remove the seed, clean it thoroughly, and start again with fresh water.
Transplanting the Seedling
Once the sprout has developed a few leaves and the root system is well-established (approximately 3-4 inches long), it’s time to transplant the seedling into soil. This transition provides the seedling with the necessary nutrients and support for continued growth.
To successfully sprout an avocado seed, suspend it in a glass of water, ensuring the wider end is submerged. Understanding the crucial role of water in plant growth is key; for a detailed explanation, check out this helpful resource on what does water do the plant 7th grade . Once roots develop, you can carefully plant your seedling in soil, continuing to water regularly to promote healthy growth.
A well-draining potting mix is ideal for young avocado plants. Choose a pot that’s slightly larger than the root system, allowing for growth. A pot with drainage holes is essential to prevent root rot.
- Gently remove the seedling from the water, taking care not to damage the delicate roots.
- Fill the pot with potting mix, leaving some space at the top.
- Create a small hole in the center of the potting mix, large enough to accommodate the root system.
- Place the seedling in the hole, ensuring the root system is fully covered with soil.
- Gently firm the soil around the base of the seedling.
- Water thoroughly, allowing excess water to drain.
- Potting mix
- Pot with drainage holes
- Small trowel or spoon
- Watering can
Caring for the Young Avocado Plant, How to plant an avocado seed in water
Continued care is essential for the healthy growth of your young avocado plant. Proper watering, fertilization, and pest control will ensure its survival and thriving.
Water the plant regularly, keeping the soil consistently moist but not waterlogged. Avoid overwatering, which can lead to root rot. Fertilize the plant every few months with a balanced liquid fertilizer, following the product instructions. Common pests include aphids, spider mites, and mealybugs. Regularly inspect your plant for any signs of infestation and treat accordingly using appropriate insecticides.
- Problem: Yellowing leaves. Solution: Check for overwatering or nutrient deficiency. Adjust watering schedule and fertilize if needed.
- Problem: Leaf drop. Solution: Check for pests, diseases, or insufficient watering. Treat pests, adjust watering, and provide adequate light.
- Problem: Stunted growth. Solution: Ensure adequate sunlight, water, and nutrients. Repot into a larger pot if necessary.
Question & Answer Hub: How To Plant An Avocado Seed In Water
Can I use any type of water for germination?
Tap water is generally fine, but let it sit out for a day to remove chlorine. Filtered or distilled water is also suitable.
How long does it take for an avocado seed to sprout?
Germination time varies, but you can typically expect to see a root emerge within a few weeks, followed by a sprout a few weeks later.
What should I do if my avocado seed starts to rot?
Immediately remove the seed from the water, clean off any decaying parts, and start again with a fresh seed. Ensure proper water levels and ventilation to prevent future rot.
What if my avocado seed doesn’t sprout?
Several factors can affect germination. Ensure the seed is healthy, the water is clean, and the environment is warm and humid. Sometimes seeds simply don’t germinate; try again with a new seed.


